With this Swift programming tutorial we will create a simple mobile app and will learn how to use Firebase Social Authentication to implement user to Login with Google account functionality. The app we are going to create will have only two views. One view with a login button and another view is protected page which will open once the user authentication is successful.
In the following two tutorials I will share how to use Firebase Social Authentication to implement Sign in with Facebook account and Sign in with Twitter accounts. So eventually we will have all thee:
- Login with Google account,
- Login with Facebook account,
- Login with Twitter account.
Let’s start with Login with Google Account!
Create a New Xcode Project
Create a new Single View Application Swift project in Xcode and give it a unique Bundle Identifier. We will need to use this Bundle Identifier when working with Firebase. In my case I have created a
com.swiftdeveloperblog.socialauthentication
as bundle identifier but yours will need to be different.

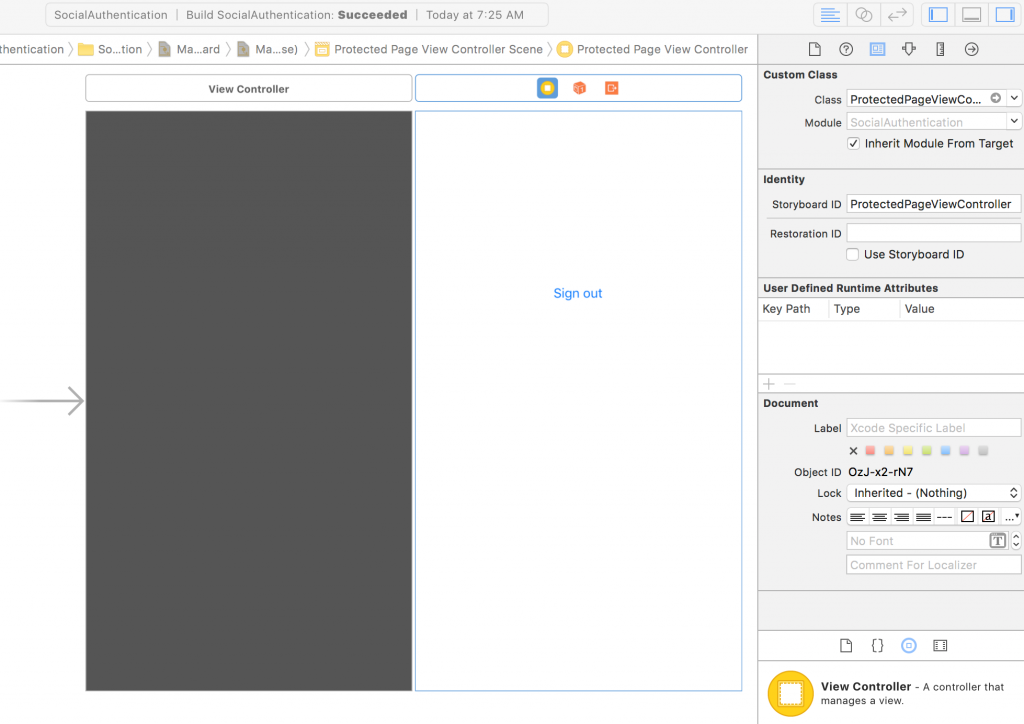
Add one more ViewController to your Main.storyboard. This new view controller will be our protected page which will be presented to user only if authentication with Google account is successful. In my case the sign in page is called ViewController.swift and has a ViewController as Storyboard ID. And the protected page is ProtectedPageViewController.swift with ProtectedPageViewController as Storyboard ID.
Create Firebase App
Use Firebase Social Authentication and implement User Sign in with Google account we will first need to create a new Firebase App. Let’s do that.
To create a new Firebase app:
- Sign in into Firebase Console,
- Click on Add project button to create a new Firebase project. You should see a dialog window inviting you to create a new project:
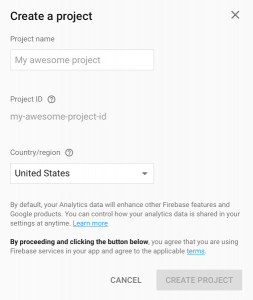
- Provide project name and Country. In my case I have provided “Social Authentication” as project name.
You will then be redirected to the project overview page. Under the Project Overview you will see a list of various services which Firebase provides developers with and which you can use for your app.

Next, you have to go to the Project Setting page which you will find next to the Project Overview (see the Settings gear icon) and add Firebase to your iOS app.
Add Firebase to your iOS app
On the image above you will see the Settings gear icon,
- Click on the Settings gear icon,
- On the Settings page click on Add Firebase to your iOS App link.

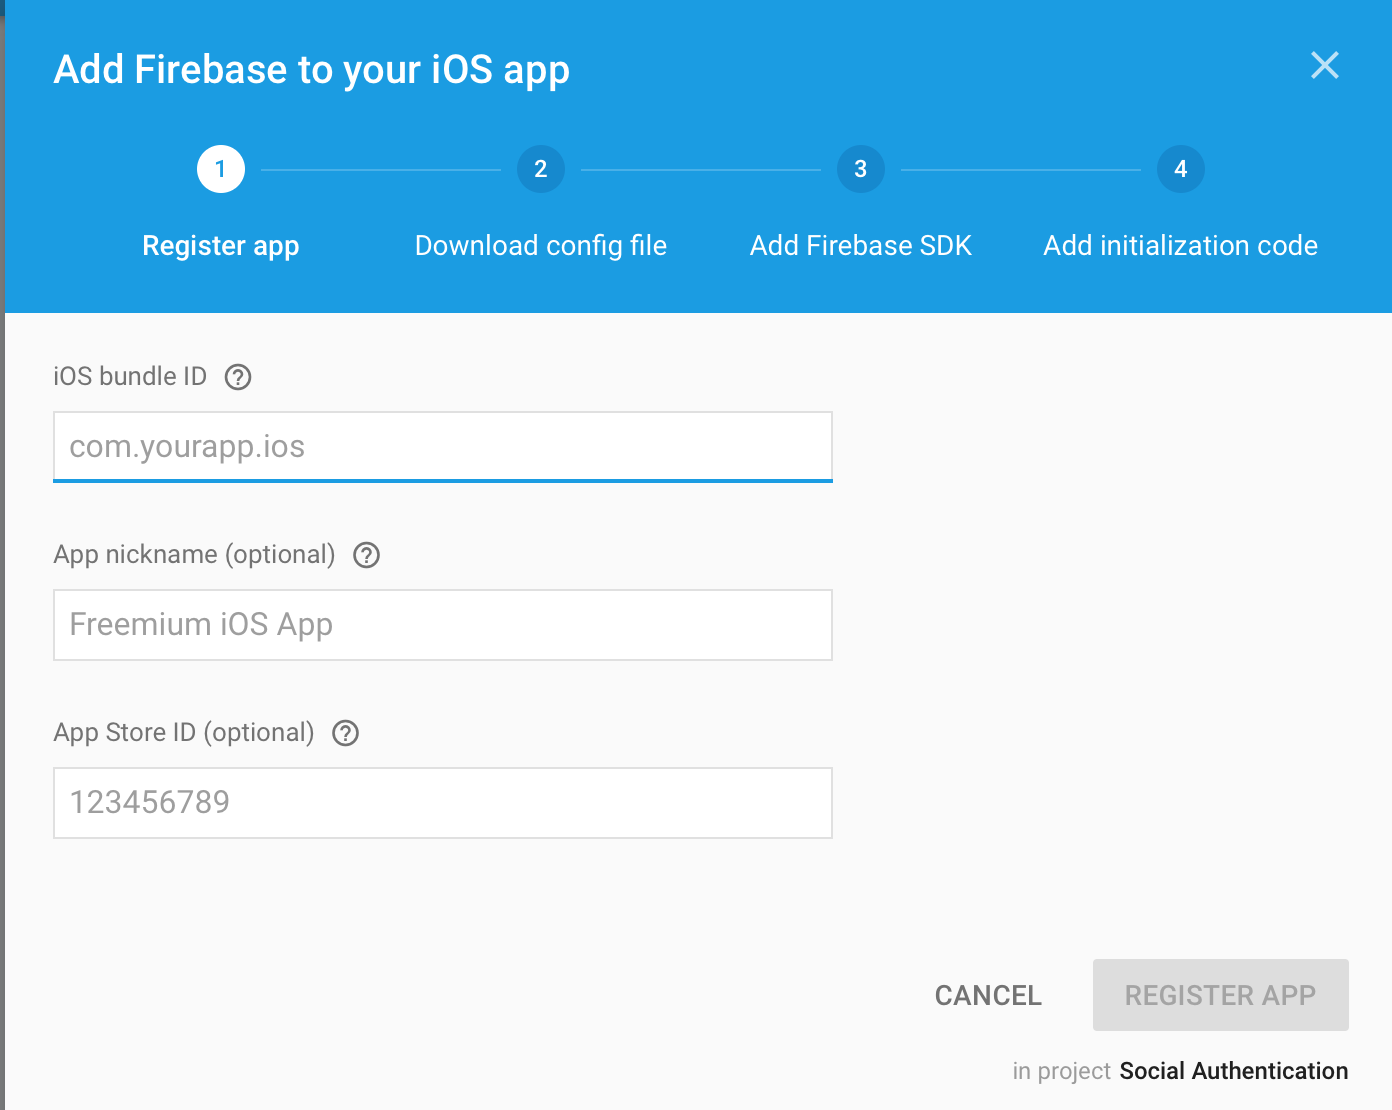
In the window that pops up enter the bundle identifier which you get from your Xcode project.
- Open Xcode project,
- Select Project name and then under Targets select name of your project,
- On General tab you will see Bundle Identifier. See the picture below
- Copy the bundle identifier and paste it into the iOS Bundle ID field which you can see on the image below:
The next step is to download the GoogleService-Info.plist and the dragging it to the project.
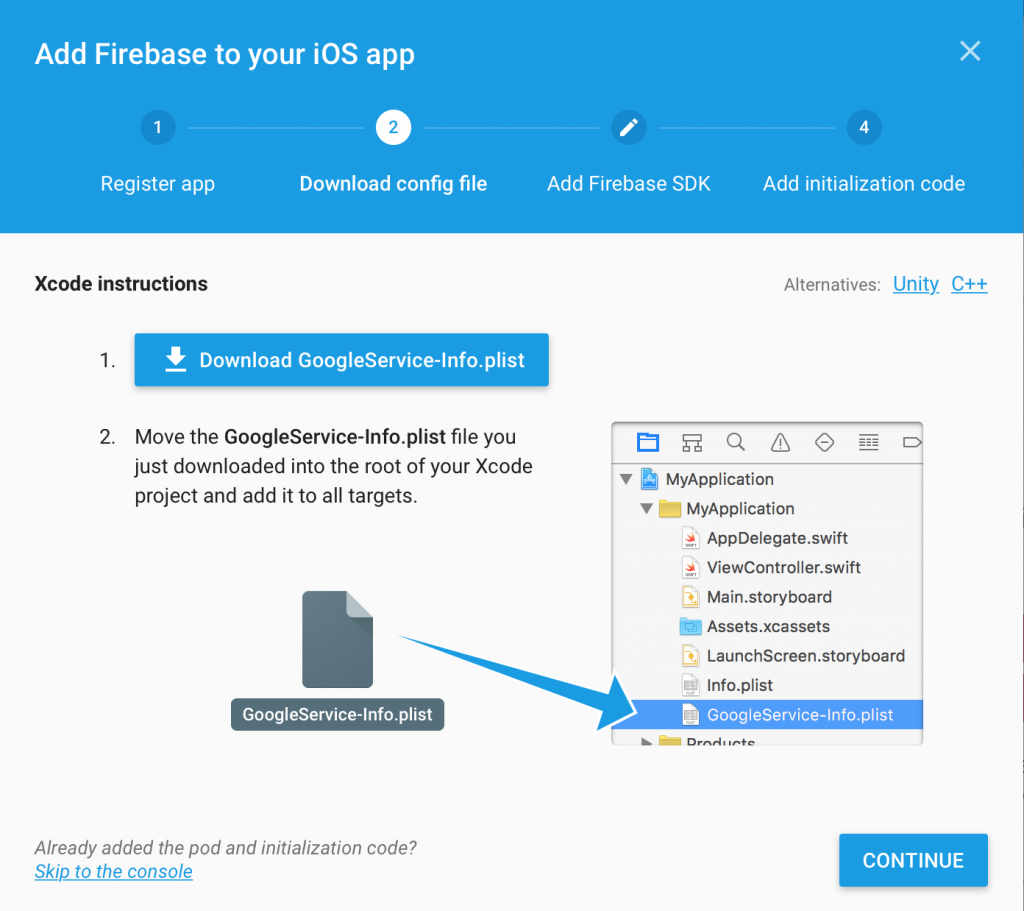
Once you have added the GoogleService-Info.plist to your project, click on Continue button.
The next step is to Add Firebase SDK to your project and we are recommended to do it using the Pods. Open a terminal window, navigate to the location of the Xcode project for your app and follow the steps shown on the image below:
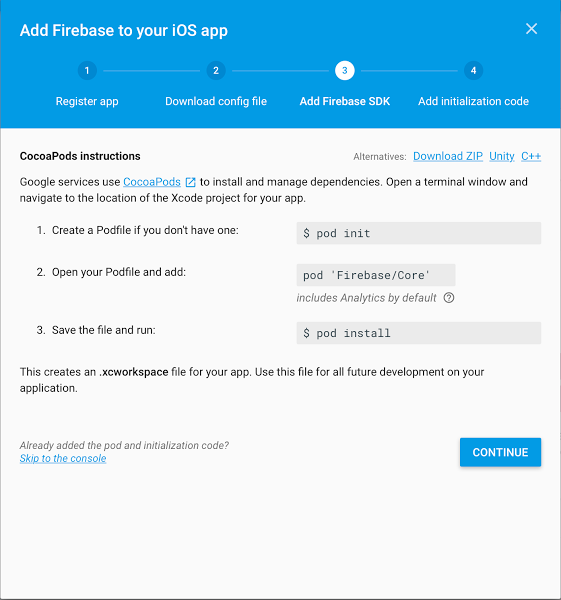
Once you are done adding Firebase SDK to your project click on Continue button.
In this tutorial we will use Swift rather than Objective-C. On the next and the final step called “Adding initialization code” you will need to add the FirebaseApp.configure() to the AppDelegate.swift file of your Xcode project.
If your Xcode project is opened, close it now. This is very important! After adding Firebase SDK to your Xcode project we need to start it using the .xcworkspace file rather than .xcodeproj. Close your Xcode project and re-open it by clicking on .xcworkspace file. Find AppDelegate.swift file and edit it by adding the FirebaseApp.configure() to the didFinishLaunchingWithOptions function as it is shown in the image below:
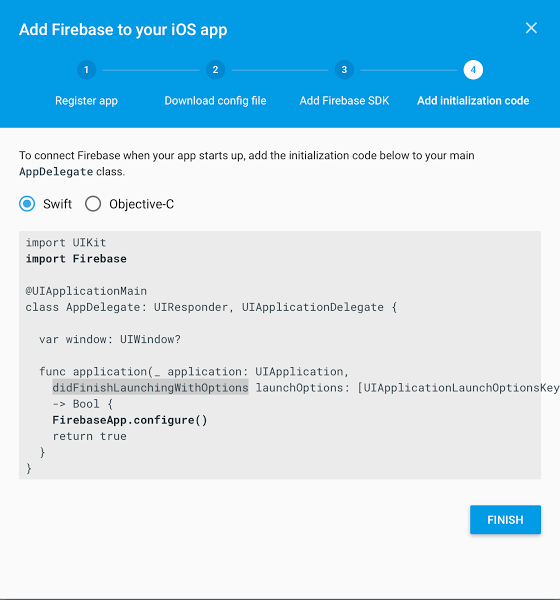
Click on Finish button to complete this flow.
Add SIGN-IN METHOD
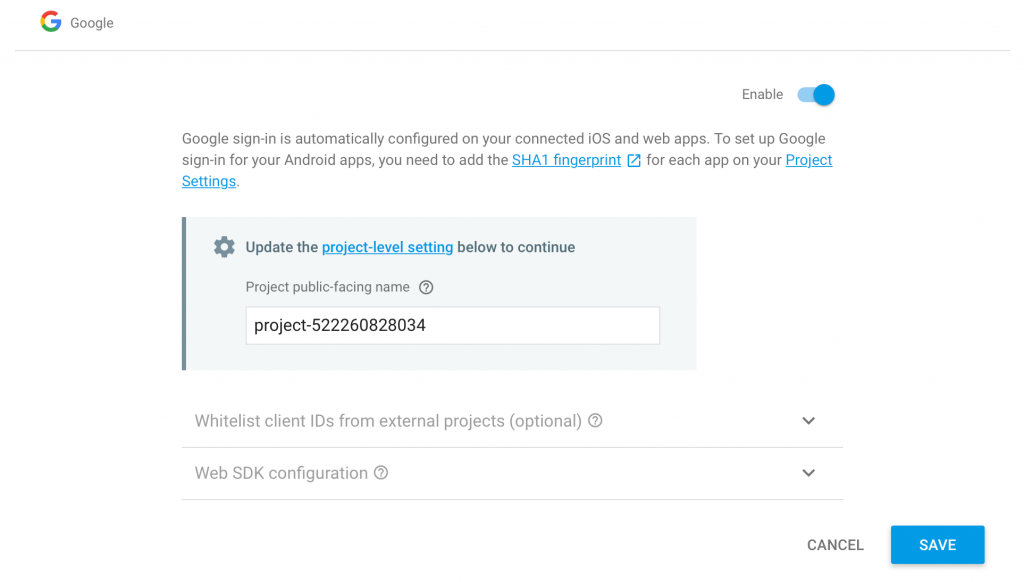
It is time to enable Google Sign-in method for our app. Look at the image below. In the list of services under the Develop header, you will see Authentication menu option.
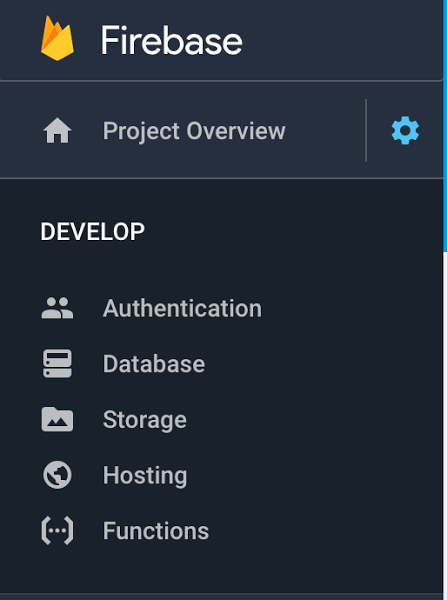
Click on the Authentication link and then click on SIGN-IN METHOD tab you’ll see that by using Firebase you have different Sign-in providers.
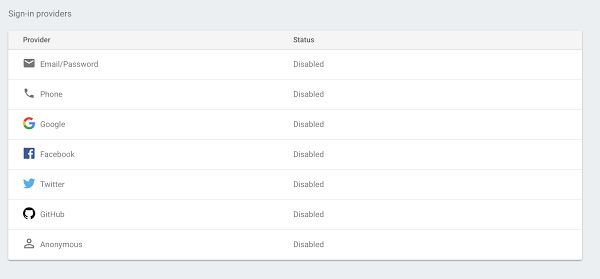
By default Google sign in method will be disabled. Click on the row and then Enable to option as it is shown on the image below:
When you switch to USERS tab you will see a list of all users who have authenticated with your app:

We are done setting up our app project in Firebase Console. Now let’s proceed with the Swift code and implement the Sign-in with Google Account feature.
Adding Firebase Google Dependencies
To let users Sign-in with their Google account to our app we will need to add Google Sign-in library dependency to our Xcode project. And since we’ve started using Pods as dependency management we will use Pods once again to add the GoogleSignIn library.
- Open the terminal and go to your project root directory.
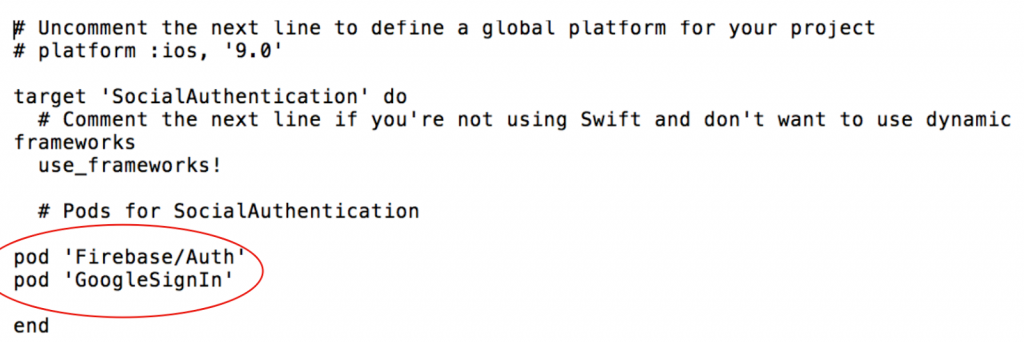
- Then, in terminal window enter the following command open Podfile. In the podfile you have to add 2 new lines just like in the image below.
- Save the pod file
- Now, after you saved the pod file file, type in terminal window the pod install command.
Remember that after you started using Pods to manage the libraries dependency for your project you will need to be opening your project using the .xcworkspace rather than .xcodeproj.
Set URLTypes and URL Schemes
Now you have to go to your Xcode project Targets, then, go to Info section and at the bottom click on URLTypes and in the URL Schemes text field enter the value of REVERSED_CLIENT_ID which you can get from GoogleService-Info.plist. which you have downloaded from Firebase and added to your Xcode project a bit earlier.

ViewController with Sign in Button
Below is a source code of Sign in page that holds the Sign in button. You have to import GoogleSignIn and Firebase in your ViewController file.
First, you have to create an instance of the GIDSignInButton, then give it a frame and add it to the view. If you run the project you’ll see that the button will appear on the screen, but if you tap on it the app will crash. To fix this you have to conform the ViewController to GIDSignInUIDelegate and set its delegate.
import UIKit
import GoogleSignIn
import Firebase

class ViewController: UIViewController, GIDSignInUIDelegate {

    override func viewDidLoad() {
        super.viewDidLoad()

        configureGoogleSignInButton()
    }

    //creating the Google sign in button
    fileprivate func configureGoogleSignInButton() {
        let googleSignInButton = GIDSignInButton()
        googleSignInButton.frame = CGRect(x: 120, y: 200, width: view.frame.width - 240, height: 50)
        view.addSubview(googleSignInButton)
        GIDSignIn.sharedInstance().uiDelegate = self

    }
  }
AppDelegate Swift File
In the AppDelegate file in the func application(_ application: UIApplication, didFinishLaunchingWithOptions launchOptions: [UIApplicationLaunchOptionsKey: Any]?) -> Bool you have to configure Firebase by adding FirebaseApp.configure() and the clientID. Also, you need to conform it to the GIDSignInDelegate
import UIKit
import Firebase
import GoogleSignIn

@UIApplicationMain
class AppDelegate: UIResponder, UIApplicationDelegate, GIDSignInDelegate {

    var window: UIWindow?

    func application(_ application: UIApplication, didFinishLaunchingWithOptions launchOptions: [UIApplicationLaunchOptionsKey: Any]?) -> Bool {

        FirebaseApp.configure()

        GIDSignIn.sharedInstance().clientID = FirebaseApp.app()?.options.clientID
        GIDSignIn.sharedInstance().delegate = self

        return true
    }

    func application(_ app: UIApplication, open url: URL, options: [UIApplicationOpenURLOptionsKey : Any] = [:]) -> Bool {
        let googleAuthentication = GIDSignIn.sharedInstance().handle(url, sourceApplication:options[UIApplicationOpenURLOptionsKey.sourceApplication] as? String, annotation: [:])


        return googleAuthentication
    }


    // Google Sign In
    func sign(_ signIn: GIDSignIn!, didSignInFor user: GIDGoogleUser!, withError error: Error!) {
        if (error) != nil {
            print("An error occured during Google Authentication")
            return
        }

        guard let authentication = user.authentication else { return }
        let credential = GoogleAuthProvider.credential(withIDToken: authentication.idToken,
                                                       accessToken: authentication.accessToken)
        Auth.auth().signIn(with: credential) { (user, error) in
            if (error) != nil {
                print("Google Authentification Fail")
            } else {
                print("Google Authentification Success")

                let mainStoryBoard: UIStoryboard = UIStoryboard(name:"Main", bundle:nil)
                let protectedPage = mainStoryBoard.instantiateViewController(withIdentifier: "ProtectedPageViewController") as! ProtectedPageViewController
                let appDelegate = UIApplication.shared.delegate
                appDelegate?.window??.rootViewController = protectedPage
            }
        }
    }


}
Please note the code inside of the Auth().signIn(with:credential) method.
If authentication is successful user will be taken to a ProtectedPageViewController. This ProtectedPageViewController is just a regular ViewController page which you will need to create. I will page the source code of this page below.
Protected Page ViewController Swift File
Below is the source code of ProtectedPageViewController which should open only if user authentication on sign in page is successful.
import UIKit
import Firebase
import GoogleSignIn

class ProtectedPageViewController: UIViewController {

    override func viewDidLoad() {
        super.viewDidLoad()

        // Do any additional setup after loading the view.
    }

    override func didReceiveMemoryWarning() {
        super.didReceiveMemoryWarning()
        // Dispose of any resources that can be recreated.
    }

    @IBAction func signOut(_ sender: Any) {

        do {
            try Auth.auth().signOut()

            let signInPage = self.storyboard?.instantiateViewController(withIdentifier: "ViewController") as! ViewController
            let appDelegate = UIApplication.shared.delegate
            appDelegate?.window??.rootViewController = signInPage

        } catch let signOutError as NSError {
            print ("Error signing out: %@", signOutError)
        }
    }

}
And this is it. If you run this code it should start with a view that contains Google Sign in button. Tap on Sign in button and login with your Google credentials. Once logged in you should see a protected page with Sign out button. Tap on Sign out button and you should be taken back to Sign in page.
Hope this tutorial is helpful for you! The following two tutorials will be:
- Use Firebase Social Authentication to Sign in with Facebook account
- and Sign in with Twitter account.
Stay tuned!
Also, since you read this tutorial you must be interested in Firebase and Swift. Check out the below list of books and video lessons on Firebase and iOS! I hope you will find some that are useful to you and your project.
Sergey
Building Mobile Apps for iOS with Swift and Firebase – Video Courses
Building Mobile Apps for iOS with Swift – Books